Category: Microsoft Exchange Server 2016

Microsoft Exchange Server 2016 – View and Configure the Whitelist

You may use the Microsoft Exchange Management Shell cmdlets below to view and configure the whitelist for Microsoft Exchange Server 2016 for an entire domain or an individual email address. The whitelist contains a list of trusted domains and/or email addresses as part of the Anti-Spam feature. The domains and/or email addresses configured using these cmdlets have all email delivered irrespective of their contents. Therefore, be sure to plan and test appropriately prior to implementing it’s use in a production environment.

Get-ContentFilterConfig
Set-ContentFilterConfig -BypassedSenderDomains domain.com
Set-ContentFilterConfig -BypassedSenders [email protected]
Set-ContentFilterConfig -BypassedSenderDomains @{Remove=”gmail.com”}
Set-ContentFilterConfig -BypassedSenders @{Remove=”[email protected]”}


Microsoft Exchange Server 2016 – Microsoft Exchange Server Deployment Assistant

Microsoft has created a web based tool that will create a step-by-step checklist for a Microsoft Exchange Server deployment called the Microsoft Exchange Server Deployment Assistant. This web based tool may be found here.


Microsoft Exchange Server 2016 – Prerequisites

The implementation of Microsoft Exchange Server 2016, like any other critical component of an Information Technology (IT) infrastructure, has prerequisites. These includes prerequisites for Microsoft Active Directory (AD) as well as the operating system.

Microsoft has provided a list of the prerequisites for Microsoft Exchange Server 2016. That documentation may be found here.


Microsoft Exchange Server 2016 – Microsoft Active Directory Schema Changes

Installing Microsoft Exchange Server 2016 requires changes to the Microsoft Active Directory (AD) schema. Typically, schema changes are feared by Microsoft Active Directory (AD) engineers and administrators. However, it doesn’t need to be that way.

Microsoft has provided a list of the schema changes that are made to Active Directory (AD) in preparation for Microsoft Exchange Server 2016. That documentation may be found here.


Microsoft Exchange Server 2016 – Exchange Server Role Requirements Calculator Version 9.1

Sizing your Microsoft Exchange infrastructure is critical to ensuring proper availability and performance. Thankfully, Microsoft provides the Exchange Server Role Requirements Calculator which may be found here. Although it states it is written for Microsoft Exchange Server 2013 this calculator may also be used for Microsoft Exchange Server 2016.


Microsoft Exchange Server 2016 – Mailbox Server Services

In many environments monitoring solutions are used to help facilitate availability and expected performance levels. Below is a representative list of Microsoft Exchange Server 2016 Mailbox server services that are good candidates for monitoring your Microsoft Exchange environment.

Microsoft Exchange Active Directory Topology
Microsoft Exchange DAG Management
Microsoft Exchange Diagnostics
Microsoft Exchange EdgeSync
Microsoft Exchange Frontend Transport
Microsoft Exchange Health Manager
Microsoft Exchange Information Store
Microsoft Exchange Mailbox Transport Delivery
Microsoft Exchange Mailbox Transport Submission
Microsoft Exchange Replication
Microsoft Exchange Transport
Microsoft Exchange Unified Messaging


Microsoft Exchange Server 2016 – Mailbox Server Role Post Installation

After installing any application it is good practice to perform post installation tasks and Microsoft Exchange Server 2016 is no exception. Below you will find a step-by-step guide for the Microsoft Exchange Server 2016 Mailbox Server role post installation tasks.

  1. Review the C:\ExchangeSetupLogs\ExchangeSetup.log file for errors or warnings.
  2. Right click the Exchange Management Shell and select Run as Administrator.
  3. Execute the Get-ExchangeServer | FT Name,ServerRole -auto cmdlet to determine the installed roles.
  4. Review the Event Viewer (Windows Logs > Application) for errors or warnings regarding Microsoft Exchange Server 2016.
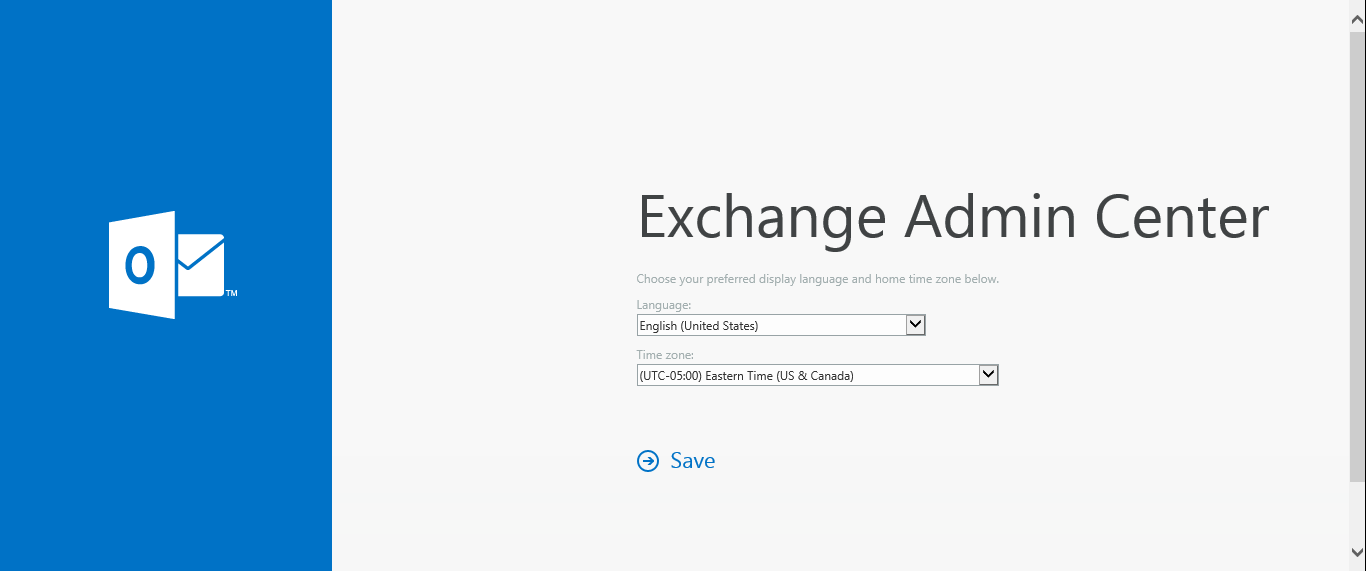
  5. Login to the Exchange Admin Center using the URL https://server/ecp.
  6. Configure the Language: and Time Zone: then click Save.

Microsoft Exchange Server 2016 – Edge Transport Role Command Line Installation

The architecture of Microsoft Exchange Server 2016 includes the Edge Transport Role server role. Below you will find a step-by-step tutorial for installing the Edge Transport Role using the command line.

  1. Right click Windows PowerShell and select Run as Administrator.
  2. Execute the following command to install Active Directory Lightweight
    Directory Services (ADLDS).

    1. Install-WindowsFeature ADLDS
  3. Install Microsoft .NET Framework 4.5.2.
  4. Execute the following command to install the Edge Transport Server role.
    1. Setup.exe /mode:install /role:EdgeTransport /IAcceptExchangeServerLicenseTerms
  5. Execute the following command to create the Edge subscription file.
    1. New-EdgeSubscription -FileName C:\Microsoft Exchange\Edge_Subscription_File.xml
  6. Copy the subscription file to a folder on the server hosting the Mailbox Server role.
  7. Run the following command on the Mailbox Server Role server to import the Edge subscription file and subscribe the Edge Transport server to the Active Directory site named Default-First-Site-Name.
    1. New-EdgeSubscription -FileData ([byte[]]$(Get-Content -Path “C:\Microsoft Exchange\Edge_Subscription_File.xml” -Encoding Byte -ReadCount 0)) -Site “Default-First-Site-Name”
  8. On the Mailbox Server Role server execute the following command to start the synchronization between the Mailbox Server Role and the Edge Transport Server role.
    1. Start-EdgeSynchronization

Microsoft Exchange Server 2016 – Mailbox Server Role Interactive Installation

Microsoft Exchange Server 2016 may be installed using the graphical user interface (GUI) or Windows PowerShell. Below you will find a step-by-step tutorial outlining the GUI installation of Microsoft Exchange Server 2016.

  1. Right click the setup.exe file and select Run as administrator.
  2. On the Check for Updates? dialog box select Connect to the Internet and check for updates then click next.
  3. On the Downloading Updates… dialog box click next.
  4. On the Introduction dialog box click next.
  5. On the License Agreement dialog box select I accept the terms in the license agreement then click next.
  6. On the Recommended Settings dialog box select Use recommended settings then click next.
  7. On the Sever Role Selection dialog box select Mailbox role then click next.
  8. On the Installation Space and Location dialog box specify the installation path of your choice.
  9. On the Exchange Organization dialog box specify the name of the Exchange Organization then click next.
  10. On the Malware Protection Settings dialog box, under the Disable malware scanning. option select No then click next.
  11. On the Readiness Checks dialog box click install.
  12. On the Setup Completed dialog box click finish.
  13. Reboot the server.

Microsoft Exchange Server 2016 – Mailbox Server Role Prerequisites

The Microsoft Exchange Server 2016 Mailbox Server role prerequisites may be installed during the graphical user interface (GUI) installation of the Mailbox Server role. Additionally, and recommended, you may use the process below to install the required prerequisites on the server that will be hosting the Mailbox Server role. These include installing operating system features, preparing Microsoft Active Directory (AD), installation Microsoft .NET Framework 4.5.2, and installing Microsoft Unified Communications Managed API 4.0, Core Runtime 64-bit.

  1. Right click Windows PowerShell and select Run as Administrator.
  2. Use the following cmdlet to install the required features, then reboot the server.
    1. Install-WindowsFeature AS-HTTP-Activation, Desktop-Experience, NET-Framework-45-Features, RPC-over-HTTP-proxy, RSAT-Clustering, RSAT-Clustering-CmdInterface, RSAT-Clustering-Mgmt, RSAT-Clustering-PowerShell, Web-Mgmt-Console, WAS-Process-Model, Web-Asp-Net45, Web-Basic-Auth, Web-Client-Auth, Web-Digest-Auth, Web-Dir-Browsing, Web-Dyn-Compression, Web-Http-Errors, Web-Http-Logging, Web-Http-Redirect, Web-Http-Tracing, Web-ISAPI-Ext, Web-ISAPI-Filter, Web-Lgcy-Mgmt-Console, Web-Metabase, Web-Mgmt-Console, Web-Mgmt-Service, Web-Net-Ext45, Web-Request-Monitor, Web-Server, Web-Stat-Compression, Web-Static-Content, Web-Windows-Auth, Web-WMI, Windows-Identity-Foundation
  3. Use the Install-WindowsFeature RSAT-ADDS cmdlet to prepare Microsoft Active Directory.
  4. Right click the Microsoft .NET Framework 4.5.2 executable file and select Run as administrator.
  5. On the .NET Framework 4.5.2 Setup dialog box select the check box that states I have read and accept the license terms., then click Install.
  6. On the Do you want Setup to close your programs? dialog  box click Yes.
  7. On the Installation is Complete dialog box click Finish.
  8. Right click the Microsoft Unified Communications Managed API 4.0, Core Runtime 64-bit executable file and select Run as administrator.
  9. On the Microsoft Unified Communications Managed API 4.0, Runtime Setup dialog box click Next >.
  10. On the Microsoft Unified Communications Managed API 4.0, Runtime Setup dialog box select the check box that states I have read and accept the license terms., then click Install.
  11. On the Installation is Complete dialog box click Finish.