Category: Microsoft Deployment Toolkit 2013

Microsoft Deployment Toolkit – Configure SQL Server Express

Microsoft Deployment Toolkit (MDT) may be connected to a Microsoft SQL Server Express database. Below you will find a step-by-step guide for configuring the database.

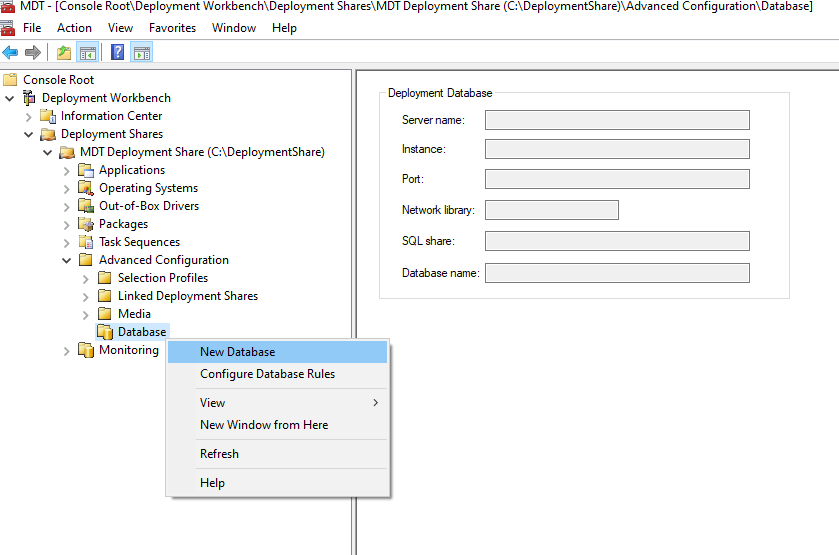
  1. In the Deployment Workbench navigate to the Advanced Configuration section, right click Database, and select New Database.
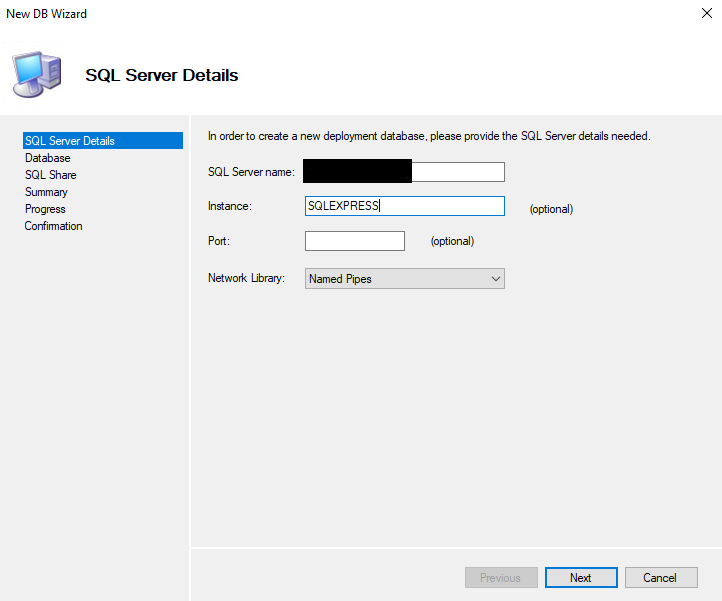
  2. In the SQL Server Details dialog box provide the SQL Server name:, Instance:, Port:, and Network Library:. Then, click Next.
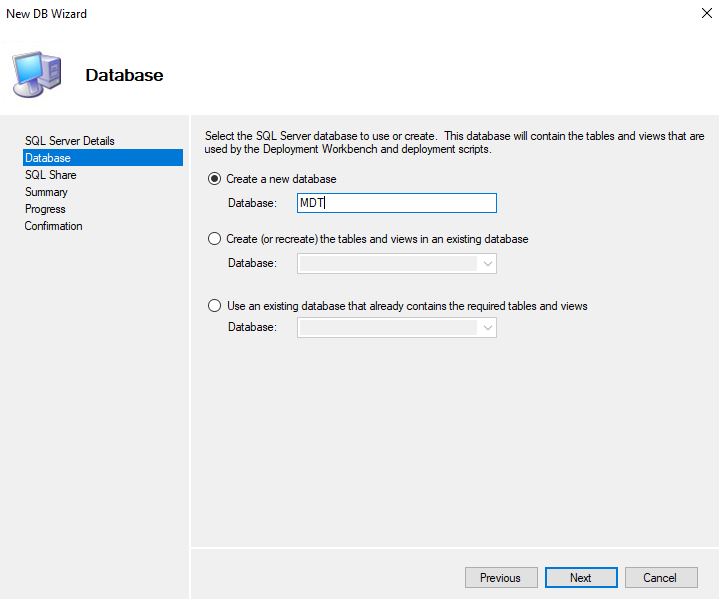
  3. In the Database dialog box select Create a new database and provide a database name in the Database: section. Then, click Next.
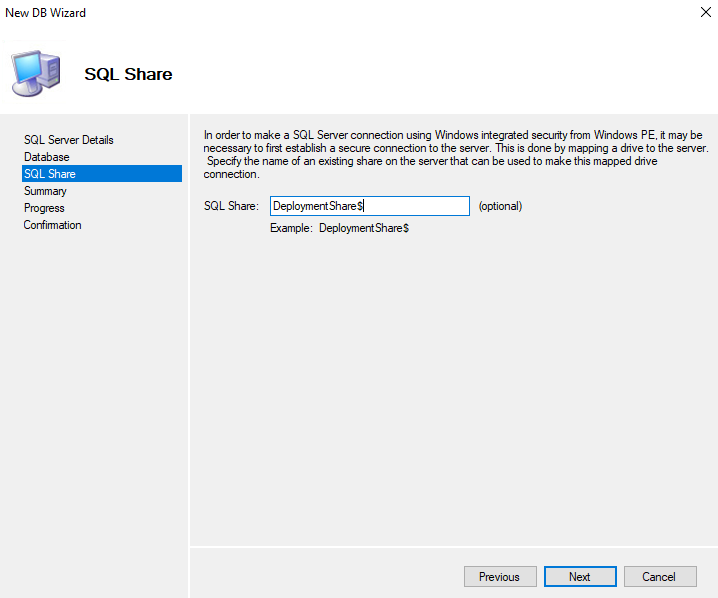
  4. In the SQL Share dialog box enter a share name in the SQL Share: section. Then, click Next.
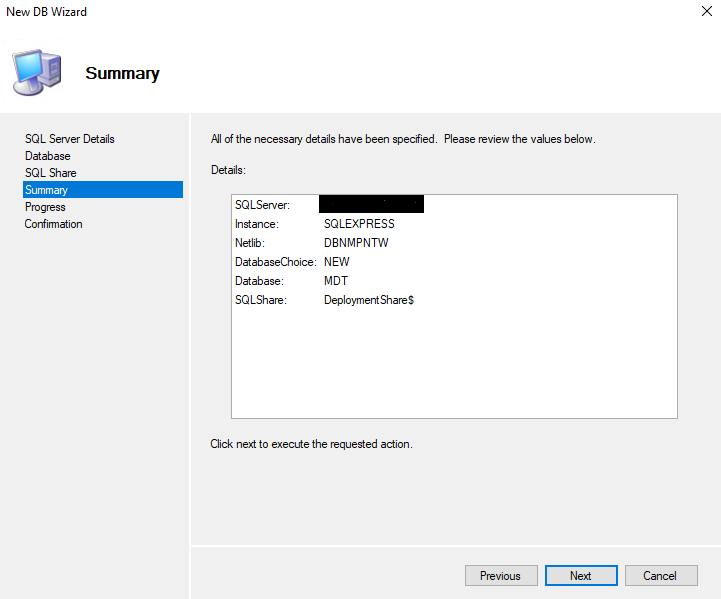
  5. In the Summary dialog box review the configuration. Then, click Next.
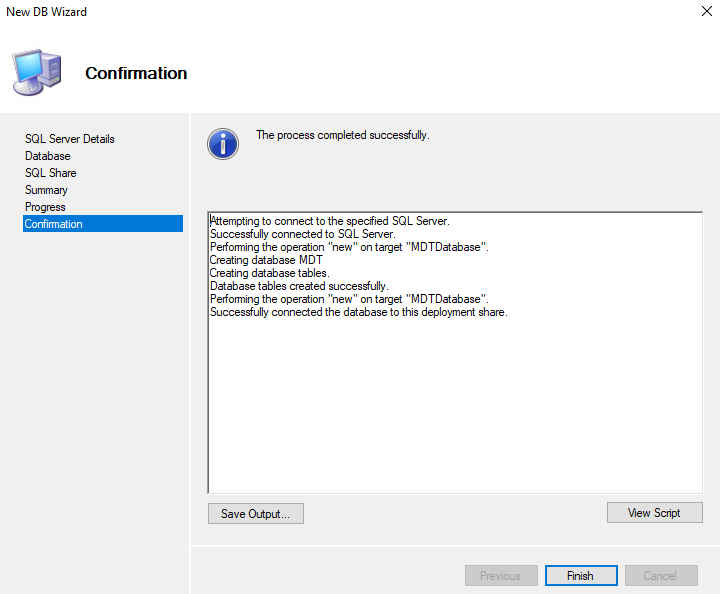
  6. In the Configuration dialog box verify the process completed successfully. Then, click Finish.

Microsoft Deployment Toolkit – Unable to Open the Specified WIM File

When updating the Microsoft Deployment Toolkit (MDT) you may receive the following error:

=== Making sure the deployment share has the latest x86 tools ===

=== Processing LiteTouchPE (x86) boot image ===

Building requested boot image profile.

System.Management.Automation.CmdletInvocationException: Unable to open the specified WIM file. —> System.Exception: Unable to open the specified WIM file. —> System.ComponentModel.Win32Exception: The system cannot find the path specified
— End of inner exception stack trace —
at Microsoft.BDD.Core.BDDWimFile..ctor(String wimPath, Boolean forUpdate)
at Microsoft.BDD.PSSnapIn.UpdateDeploymentPoint.UpdateBootImage(String template, String platform, String dpPath, Boolean createISO, String isoName)
at Microsoft.BDD.PSSnapIn.UpdateDeploymentPoint.ProcessRecord()
at System.Management.Automation.CommandProcessor.ProcessRecord()
— End of inner exception stack trace —
at System.Management.Automation.Runspaces.PipelineBase.Invoke(IEnumerable input)
at Microsoft.BDD.Wizards.UpdateProgress.WizardProcessing()
at Microsoft.BDD.Wizards.WizardProgress.InitiateWizardProcessing()

Since you already have the Windows ADK installed you will need to download and install the Windows PE add-on for the ADK (link here). Once the Windows PE add-on for the ADK has been installed you will be able to successfully update the MDT deployment share.


Automation – Silent Installation of Applications

Automating application installations is a great way to cut down on the deployment time of workstations for your end users. Having completed a domain/operating system migration in the past I can attest to the benefits of an automated deployment. Below you will find a list of applications and their silent installation parameters:

7-Zip: msiexec.exe /i “7z920-x64.msi” /qn

Adobe Air: “AdobeAIRInstaller.exe” -silent

Adobe Flash Player: msiexec.exe /i “install_flash_player_11_active_x.msi” /qn /norestart

Adobe Reader XI: msiexec.exe /i AcroRead.msi EULA_ACCEPT=YES /qn

Adobe Shockwave Player: msiexec.exe /i “sw_lic_full_installer.msi” /qn /norestart

Apple Application Support: msiexec.exe /i “AppleApplicationSupport.msi” /qn /norestart

Apple Quicktime: msiexec.exe /i “QuickTime.msi” /qn /norestart

Barracuda Malware Removal Tool: setup.exe /verysilent /norestart

Microsoft Silverlight: Silverlight.exe /q

Mozilla Firefox: “Firefox Setup 25.0.exe” -ms

Oracle Java: JavaSetup7u45.exe /s

VLC Media Player: vlc-2.1.1-win32.exe /S


Automation – Adobe Flash Player 11.x Silent Installation

If you interested in deploying Adobe Flash Player 11 silently you may download the MSI from the Adobe Flash Player Distribution website. Additionally, the command below may be used to install application silently.

msiexec.exe /i “install_flash_player_11_active_x.msi” /qn /norestart

Enjoy!


Adobe Customization Wizard XI – Install Adobe Reader XI

You may use the following method to install Adobe Reader XI silently and accept the End User License Agreement (EULA):

msiexec.exe /i AcroRead.msi EULA_ACCEPT=YES /qn

Additionally, you may use the Adobe Customization Wizard XI to customize the installation of Adobe Reader XI. Please keep in mind that the Adobe Customization Wizard must match the version of Adobe Reader that you are installing.

Lastly, in order to get the .msi file you must first install the Adobe Reader XI application then navigate to the “C:\ProgramData\Adobe\Setup\{AC76BA86-7AD7-1033-7B44-AB0000000001}\” directory to retrieve it. This directory also contains the Setup.ini file which is needed in order to save any settings, using the Adobe Customization Wizard XI, to the .msi file.

Enjoy!


Microsoft Office Customization Tool – Suppress Reboot

I was troubleshooting a Dirty Environment Found error while Microsoft Deployment Toolkit (MDT) 2013 was installing Microsoft Office Professional Plus 2010. The error was caused because Microsoft Office Professional Plus 2010 was rebooting the desktop after its installation and the reboot was disrupting the MDT task sequence.

I was using the Office Customization Tool for the installation of Microsoft Office Professional Plus 2010 but I was unable to find a dialog box that would allow me to suppress the reboot. After some quick research I found the solution. In the  Office Customization Tool navigate to Setup > Modify Setup properties then add a property value with a Name: of SETUP_REBOOT and a Value: of Never.

Enjoy!


Microsoft Office 2010 – Office Customization Tool

If you ever find yourself performing a large scale deployment of Microsoft Office Professional Plus 2010 you may use the Office Customization Tool to customize the deployment.For instance, you may specify the product key to use as well as perform a silent installation.

I found this Utility Spotlight article very helpful.

Enjoy!