I am officially an Amazon Web Services Certified Solutions Architect.
Ubuntu – Eth0 Missing after Virtual Machine Migration
I recently performed the migration of a Microsoft Hyper-V virtual machine (VM) running Ubuntu 16.04.5 LTS to VMware using the VMware vCenter Converter. After the migration the VM would not connect to the network. Upon research I found that the eth0 network interface was renamed to ens160. This was determined by running the following command:
dmesg | grep eth0
There was a line that said:
vmxnet3 0000:03:00.0 ens160: renamed from eth0
The final step was to create a backup of the /etc/network/interfaces file then edit it using the vi editor by removing all entries of eth0 and replacing them with the new network interface name of ens160.
VMware ESXi 6.7 – View the ARP Table
Recently, I needed to select the Internet Protocol (IP) addresses for various VMkernel adapters. In selecting IP addresses you must be certain that the IP address is not already in use to avoid an IP address conflict. One way to determine this is to ping the IP address in question. However, what do you do if ICMP traffic is filtered?
In that case, you can ping the IP address in question from another host on the subnet and view it’s Address Resolution Protocol (ARP) table. The command below may be used to view the ARP table of a VMware ESXi 6.7 host.
esxcli network ip neighbor list
Microsoft Windows Command Prompt – Configure Network Settings
You may use the following commands from the Windows command prompt to configure the IP address and DNS server of a server running Microsoft Windows Server 2016 Standard. You will need to modify the name of the network interface card, IP address, subnet mask, default gateway, and DNS server.
netsh
interface ip set address name=”ethernet” static 10.0.25.100 255.255.255.0 10.0.25.1
interface ip set dns “ethernet” static 10.0.50.100
interface ip show config
exit
Lastly, more information may be found here.
Integrated Dell Remote Access Controller 8 – Get IP Address
Have you ever connected to a remote server but didn’t know what it’s Integrated Dell Remote Access Controller 8 (iDRAC8) Internet Protocol (IP) address was?
Well, you may use the following command to get the IP address of an iDRAC8.
racadm getniccfg
Additionally, more information may be found here.
Microsoft Hyper-V – View All Virtual Machines in a Failover Cluster
You may use the following Microsoft Windows PowerShell cmdlet to view all of the virtual machines in a Microsoft Windows Hyper-V Failover Cluster. In order for this cmdlet to provide the list of virtual machines it will need to be run from a Hyper-V host in the cluster.
Get-ClusterGroup | ? {$_.GroupType -eq ‘VirtualMachine’ } | Get-VM
Microsoft Office 365 – Export Group Members
You may use the following commands to connect to Microsoft Office 365 from Windows PowerShell then export the members of a group to a file of your choice.
Set-ExecutionPolicy RemoteSigned
$UserCredential = Get-Credential
$Session = New-PSSession -ConfigurationName Microsoft.Exchange -ConnectionUri https://outlook.office365.com/powershell-liveid/ -Credential $UserCredential -Authentication Basic -AllowRedirection
Import-PSSession $Session -DisableNameChecking
Get-UnifiedGroup -Identity “<<<INSERT_GROUP_NAME>>>” | Get-UnifiedGroupLinks -LinkType Member | Out-File -Filepath “<<<INSERT_FILE_PATH>>>”
Remove-PSSession $Session
VMware ESXi 6.7 – View CDP Information
Have you ever connected a VMware ESXi 6.7 host to a switch port that wasn’t tagged with the correct VLAN for the management network and you weren’t able to physically trace the network cable back to the switch? If so, you know the result is that you are unable to connect to the host. However, all hope is not lost as VMware ESXi utilizes the Cisco Discovery Protocol (CDP) to provide you with the hostname, IP address, and switch port that the VMNIC/s are connected to for the management network. With that said, below you’ll find the procedure and commands to view the CDP information.
NOTE: This example assumes you are connecting to the DCUI from an iDRAC or iLO.
- From the VMware Direct Console User Interface (DCUI) enable the ESXi shell (Troubleshooting Options > Enable ESXi Shell)
- Press Alt+F1 to enter the ESXi shell
- Enter the root authentication credentials
- Enter the following command to view the CDP information for VMNIC0: vim-cmd hostsvc/net/query_networkhint –pnic-name=vmnic0
- In the output verify the following information:
- connectedSwitchPort
- devId = “switch_hostname“
- address = “x.x.x.x“
- portID = “GigabitEthernetx/x/x“
- connectedSwitchPort
- Exit the ESXi shell
- Press Alt+F2 to enter the DCUI
- Disable the ESXi shell
- Logout of the DCUI
Lastly, more information may be found using this VMware knowledge base article.
Internet Information Services – Configure Multiple Websites on One IP Address
You may configure Internet Information Services (IIS) to host multiple websites using the same internet protocol (IP) address. This may be done by utilizing separate ports on the same IP address or through the use of host headers. In this example, we will configure host headers as it is a simpler solution than using a separate port.
Before we begin I would like to provide a list of prerequisites:
- Specify the website domain names. In this example, we will use domain.com and website.com.
- Create a folder path for each website. In this example, we will use C:\inetpub\sites\domain.com and C:\inetpub\sites\website.com.
- Create an index.html file, or any other default document of your choice, in each of the directories above.
- Edit the C:\Windows\System32\drivers\etc\hosts file on the local server or remote client to test the host header configuration or create DNS entries to resolve these domain names to the appropriate IP address. If not, the web traffic will be routed to public web servers hosting these domains.
With that said, let’s begin our configuration in IIS.
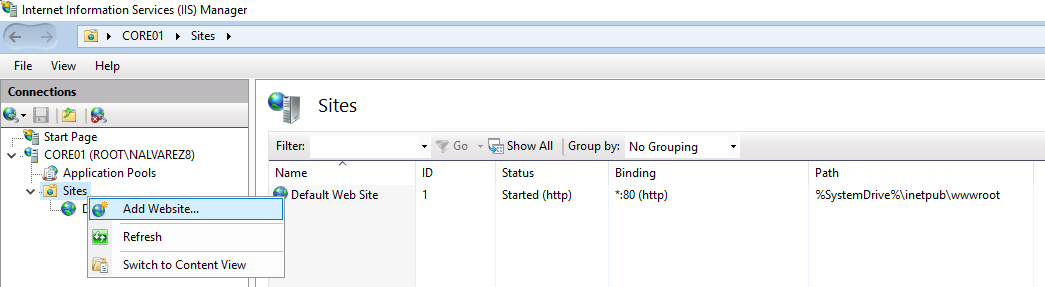
- On the Internet Information Services (IIS) Manager interface right click Sites and select Add Website….
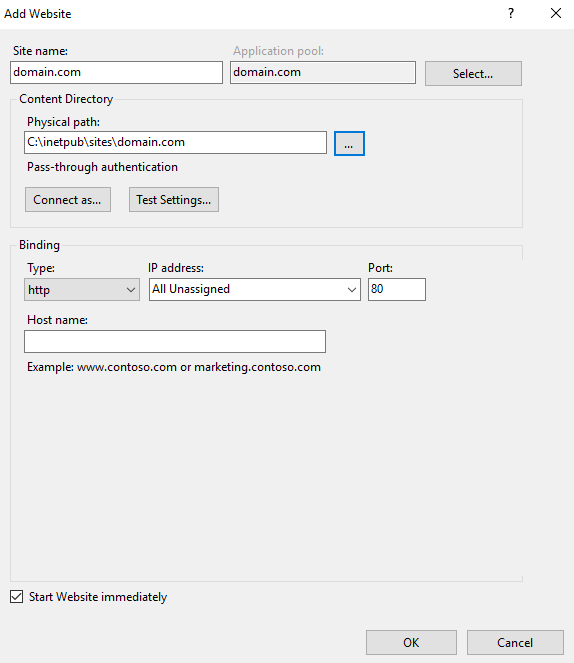
- In the Add Website dialog box enter the Site name: and Physical path: then click OK.
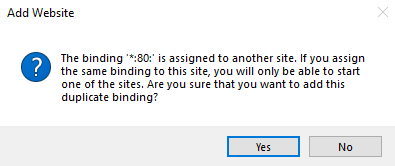
- On the Add Website dialog box select Yes to add the duplicate binding. NOTE: We will change this next.
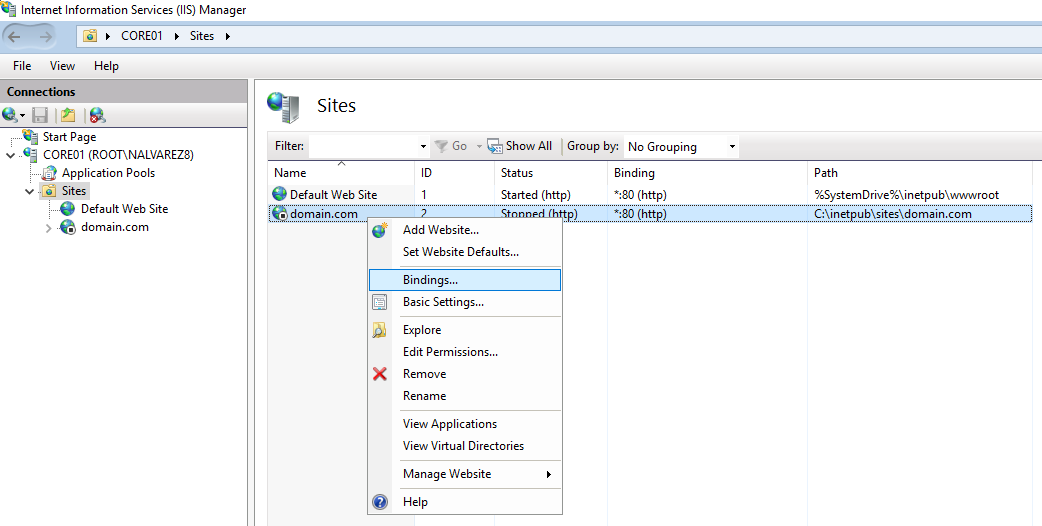
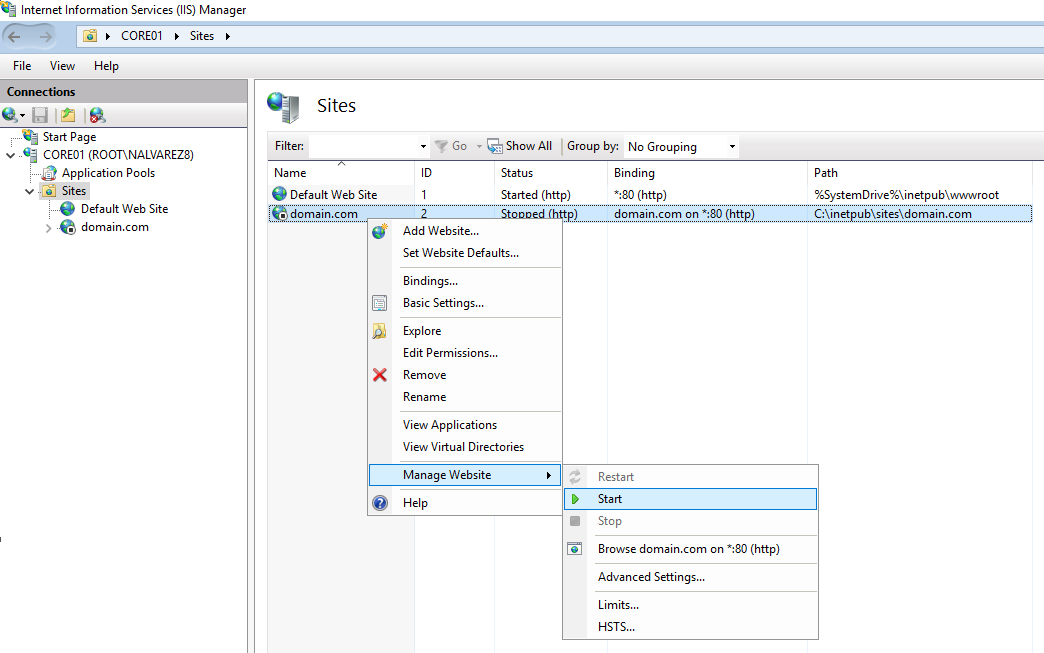
- Verify that the new website, domain.com, is not running.

- Right click domain.com and select Bindings….
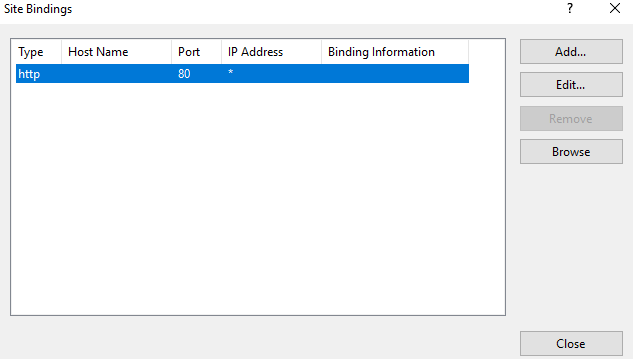
- In the Site Bindings dialog box select the http binding and click Edit….
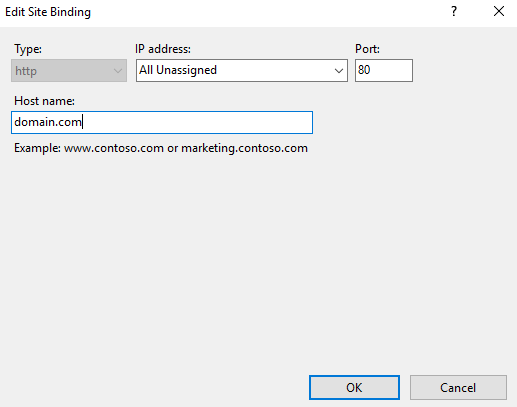
- In the Edit Site Binding dialog box enter domain.com in the Host name: field and click OK.
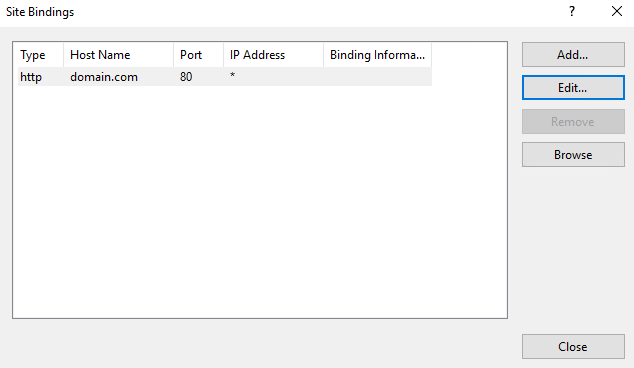
- In the Site Bindings dialog box click Close.
- Right click domain.com and select Manage Website > Start.
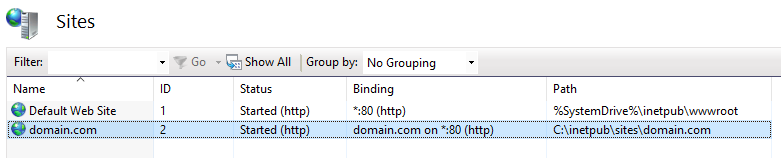
- Verify the domain.com website has started.
- Repeat steps 1-10 for website.com.
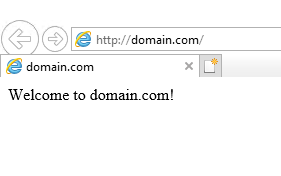
- Right click domain.com and select Manage Website > Browse domain.com on *:80 (http).

- Verify the web browser returns the index.html file you created for domain.com from the local server and remote client.
- Repeat step 13 for website.com.

Microsoft Deployment Toolkit – Configure SQL Server Express
Microsoft Deployment Toolkit (MDT) may be connected to a Microsoft SQL Server Express database. Below you will find a step-by-step guide for configuring the database.
- In the Deployment Workbench navigate to the Advanced Configuration section, right click Database, and select New Database.
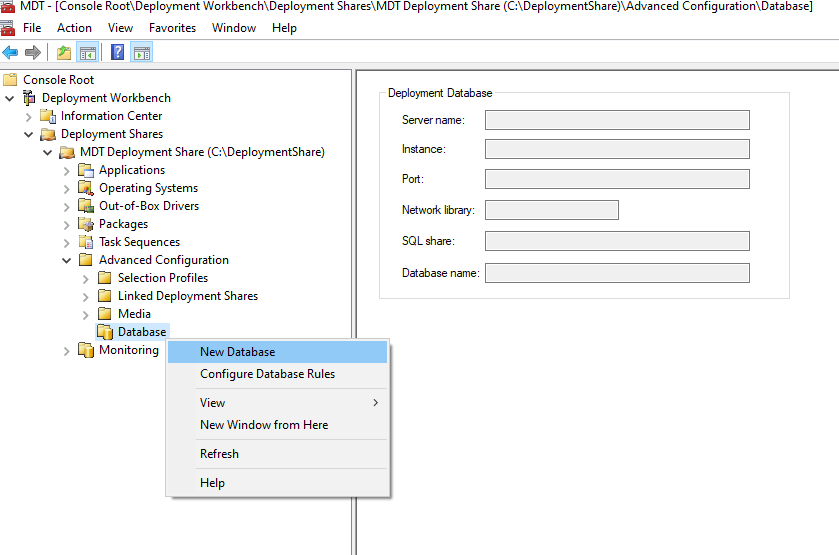
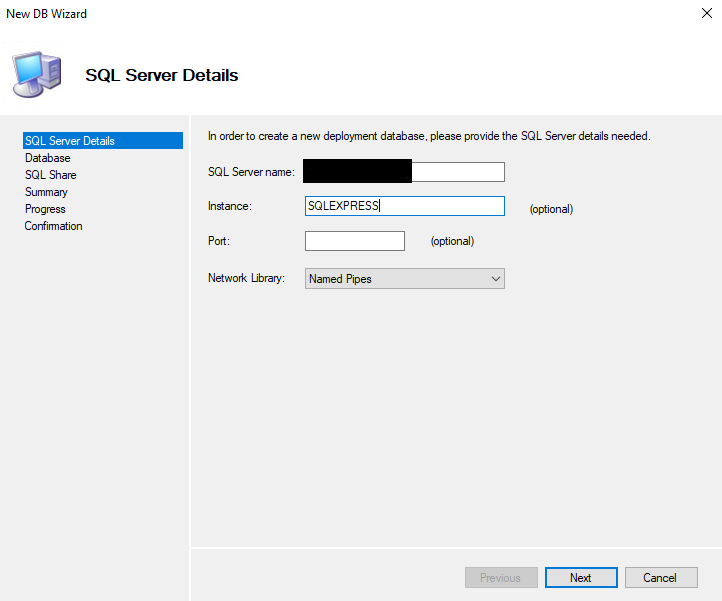
- In the SQL Server Details dialog box provide the SQL Server name:, Instance:, Port:, and Network Library:. Then, click Next.
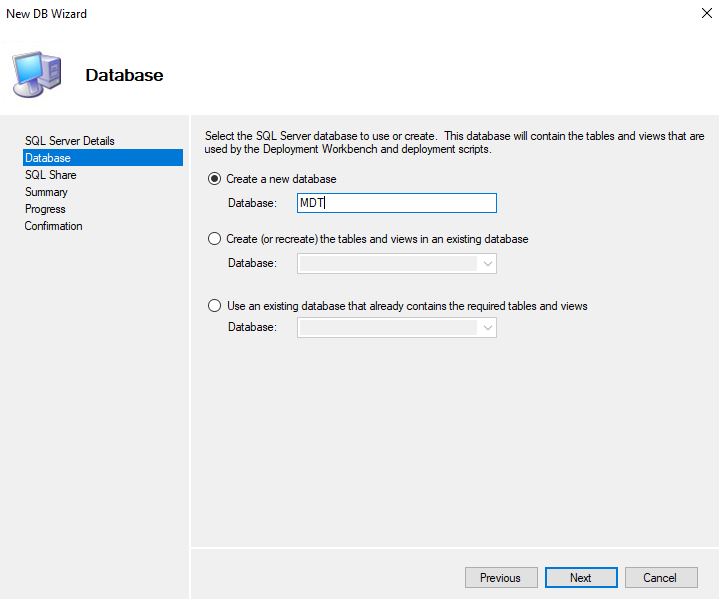
- In the Database dialog box select Create a new database and provide a database name in the Database: section. Then, click Next.
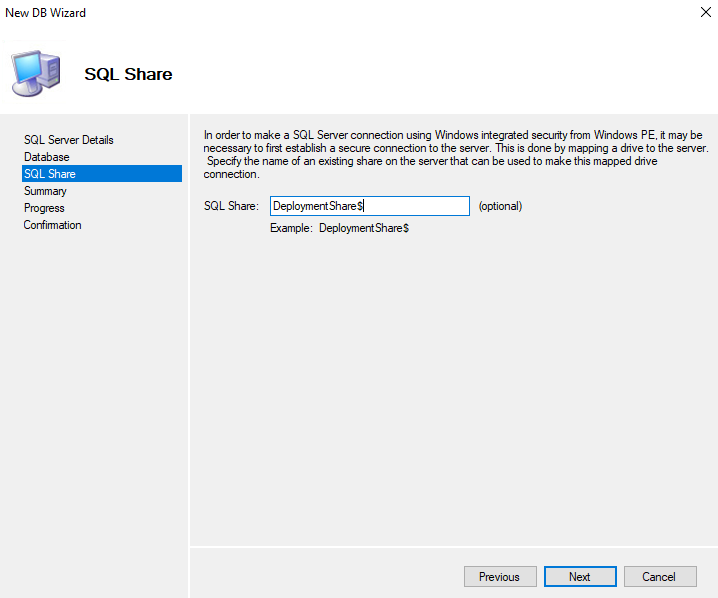
- In the SQL Share dialog box enter a share name in the SQL Share: section. Then, click Next.
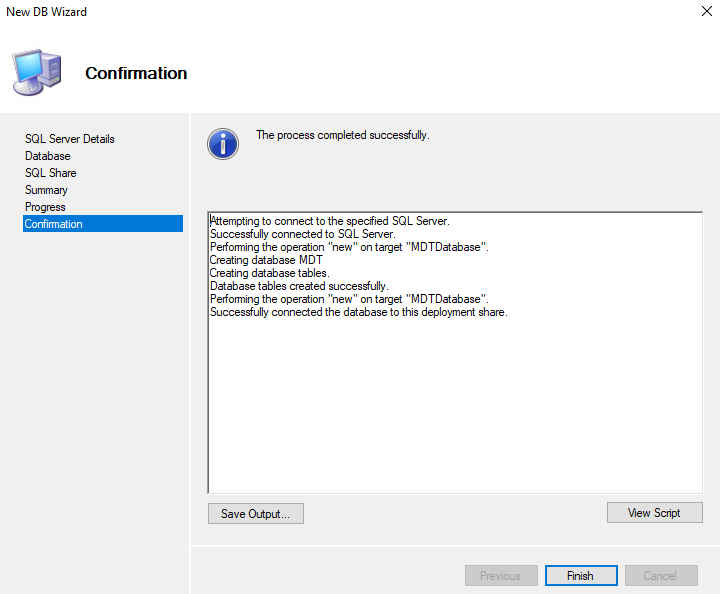
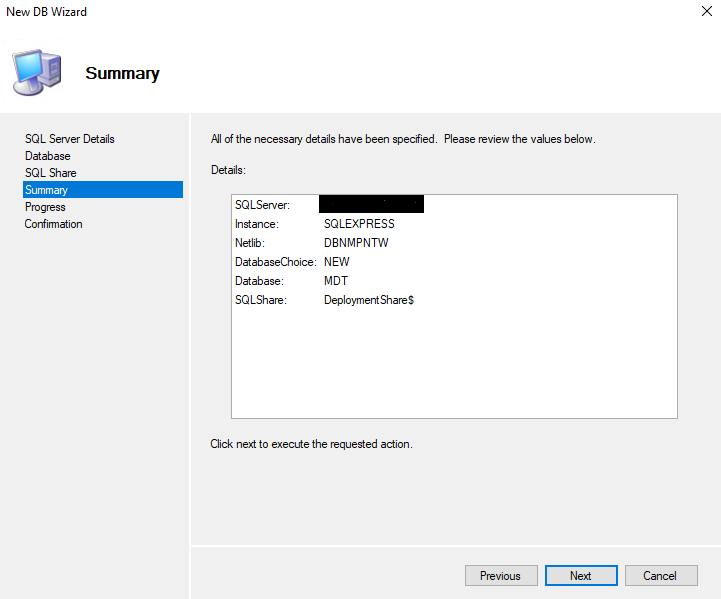
- In the Summary dialog box review the configuration. Then, click Next.
- In the Configuration dialog box verify the process completed successfully. Then, click Finish.