Category: Red Hat Enterprise Linux 7

Red Hat Enterprise Linux 7 – Banner

While logging into a Red Hat Enterprise Linux 7 server by means of SSH you may be addressed by a login banner. You may use the steps below to create the login banner.

  1. Edit the /etc/ssh/sshd_config file (i.e. Banner /etc/banner)
  2. Create the /etc/banner file
  3. Restart the SSH service (i.e. systemctl restart sshd)

Red Hat Enterprise Linux 7 – Message of the Day

You may use the following example as a Red Hat Enterprise Linux (RHEL) 7 message of the day (MOTD). This file is located at /etc/motd.

#########################################################################
# For Authorized Use Only #
# #
# Activities on this system are subject to being monitored #
# or recorded for all users, authorized or unauthorized. #
# Use of the system is considered consent to such monitoring. #
# Any evidence of possible criminal activity may be provided #
# to law enforcement. #
# #
#########################################################################


Red Hat Enterprise Linux 7 – Sample Kickstart File

Red Hat Enterprise Linux (RHEL) 7 provides a kickstart file that you may use to automate the installation of RHEL. Below is a sample kickstart file (ks.cfg) that you may modify for the automated installation of RHEL.


#version=DEVEL
# System authorization information
auth –enableshadow –passalgo=sha512
# Use CDROM installation media
cdrom
# Use graphical install
graphical
# Run the Setup Agent on first boot
firstboot –enable
ignoredisk –only-use=sda
# Keyboard layouts
keyboard –vckeymap=us –xlayouts=’us’
# System language
lang en_US.UTF-8

# Network information
network –bootproto=static –device=eth0 –gateway=x.x.x.x –ip=x.x.x.x –nameserver=x.x.x.x,x.x.x.x –netmask=x.x.x.x –ipv6=auto –activate
network –hostname=rhel01

# Root password
rootpw –iscrypted $6$fa
# System services
services –disabled=”chronyd”
# System timezone
timezone America/New_York –isUtc –nontp
user –name=tuser –password=$6$zn

iscrypted –gecos=”Temporary User”
# X Window System configuration information
xconfig –startxonboot
# System bootloader configuration
bootloader –append=” crashkernel=auto” –location=mbr –boot-drive=sda
# Partition clearing information
clearpart –all –initlabel –drives=sda
# Disk partitioning information
part /boot –fstype=”xfs” –ondisk=sda –size=500
part swap –fstype=”swap” –ondisk=sda –size=4096
part pv.614 –fstype=”lvmpv” –ondisk=sda –size=46603
volgroup centos –pesize=4096 pv.614
logvol / –fstype=”xfs” –size=20480 –name=root –vgname=centos
logvol /home –fstype=”xfs” –size=26120 –name=home –vgname=centos

%packages
@^graphical-server-environment
@base
@core
@desktop-debugging
@dial-up
@fonts
@gnome-desktop
@guest-agents
@guest-desktop-agents
@input-methods
@internet-browser
@multimedia
@print-client
@x11
kexec-tools

%end

%addon com_redhat_kdump –enable –reserve-mb=’auto’

%end


Red Hat Enterprise Linux 7 – BIND Installation and Configuration

Domain Name System (DNS) is an integral component of any Information Technology (IT) infrastructure. This is a step by step guide for configuring a Red Hat Enterprise Linux 7 public facing DNS server using the BIND software package. Additionally, I would like to add that, for the purposes of this demonstration the zone file created for noelalvarez.net is not pointing to the genuine Internet Protocol (IP) address of the website.

  1. Enter the command yum update -y to update the server.01
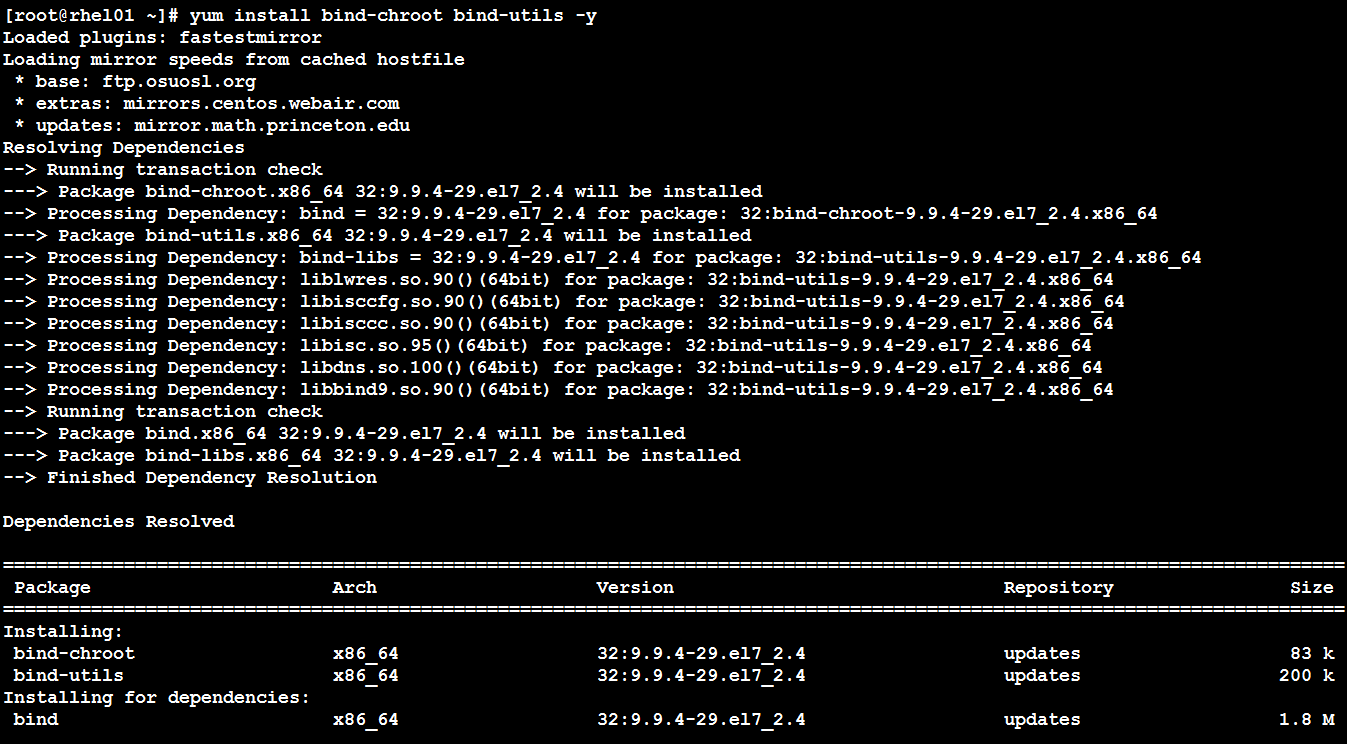
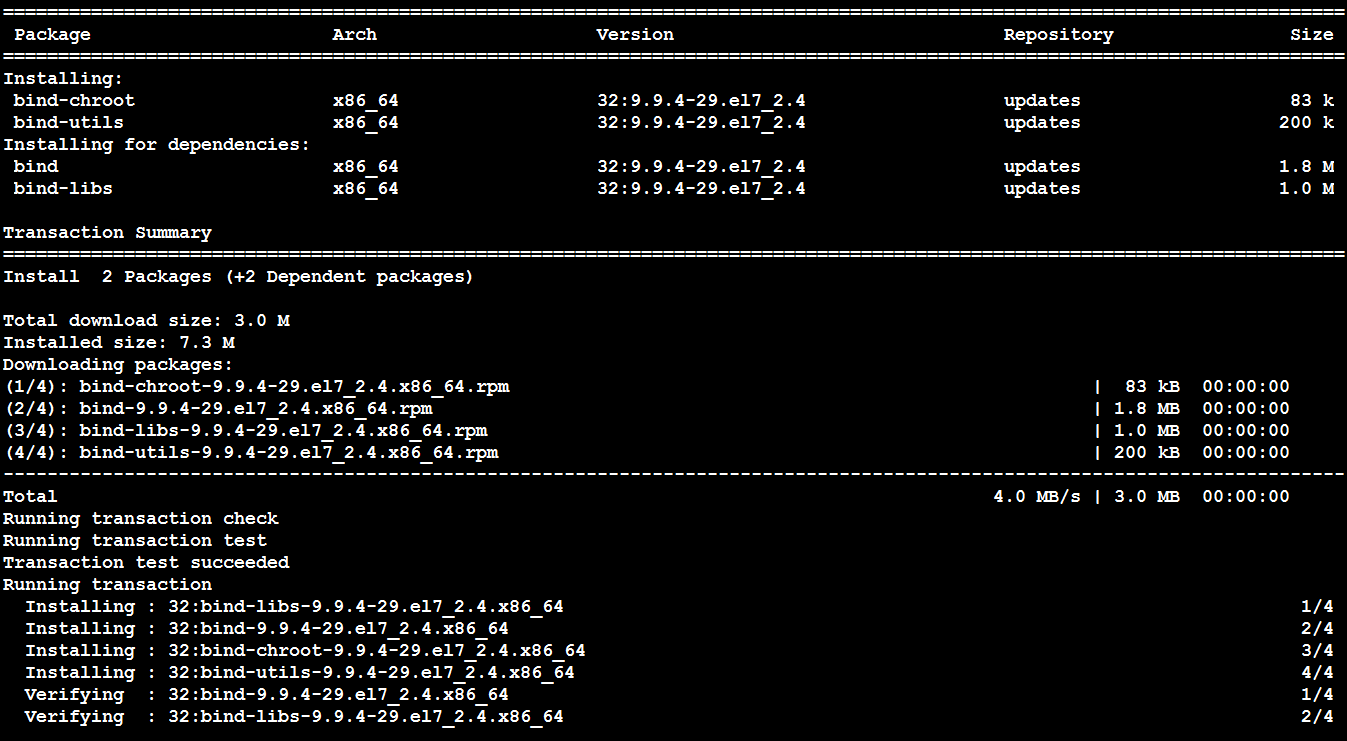
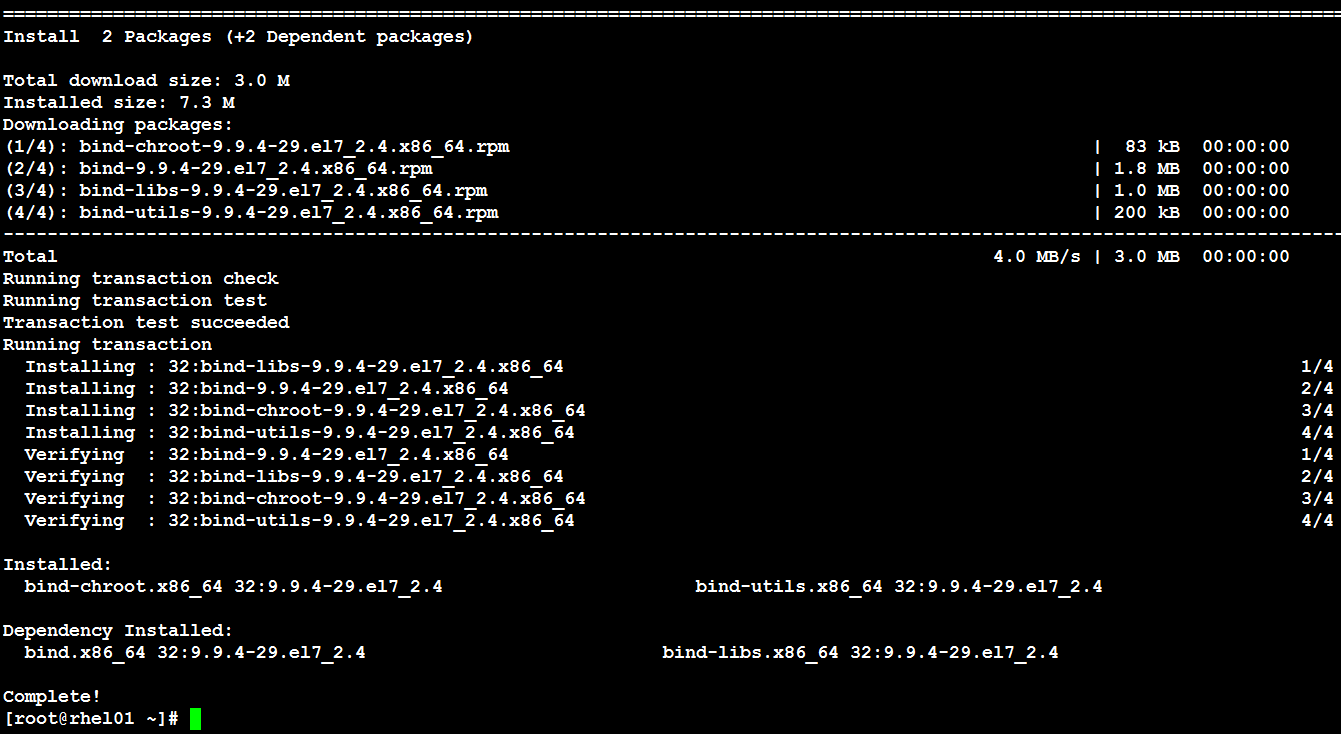
  2. Enter the command yum install bind-chroot bind-utils -y to install bind and DNS utilities.02-0102-0202-03
  3. Enter the command systemctl start named-chroot to start the DNS server.03
  4. Enter the command systemctl status named-chroot to verify the DNS server is running.04
  5. Enter the command rndc status to verify the name server control utility is running (i.e. server is up and running).05
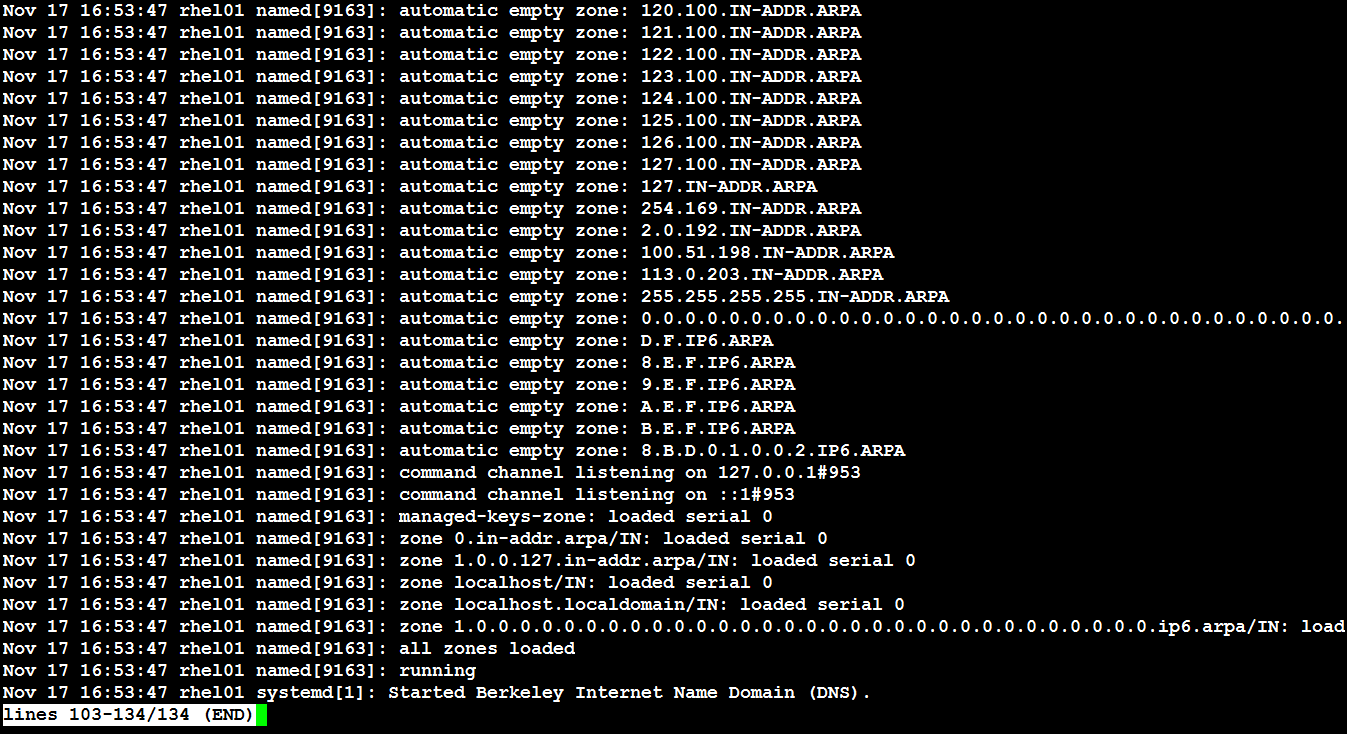
  6. Enter the command journalctl -u named-chroot to verify there are no errors.06-0106-02
  7. Enter the command systemctl enable named-chroot to configure BIND to start automatically after a reboot.07
  8. Enter the command cd /etc to navigate to the etc directory.08
  9. Enter the command cp named.conf named.conf.2016111700 to create a copy of the named.conf file.09
  10. Using a text editor, edit the following fields in the name.conf file.
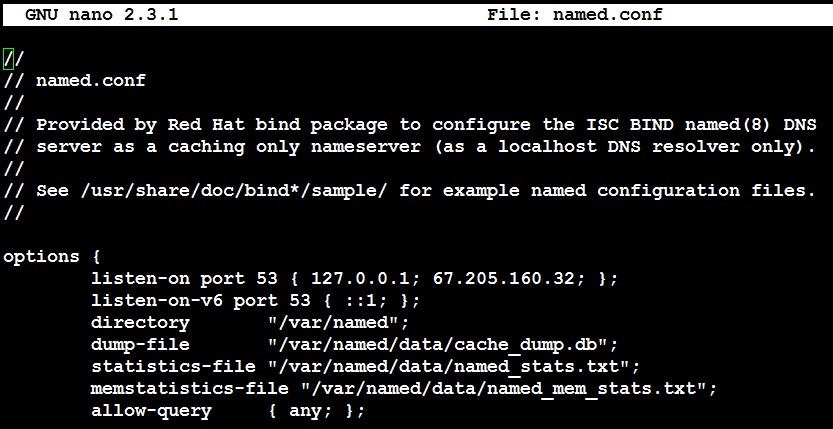
    1. listen-on port 53 { 127.0.0.1; }; NOTE: Add the Internet Protocl (IP) address of the host.10-01
    2. allow-query     { localhost; }; NOTE: delete localhost; and add any;.10-01
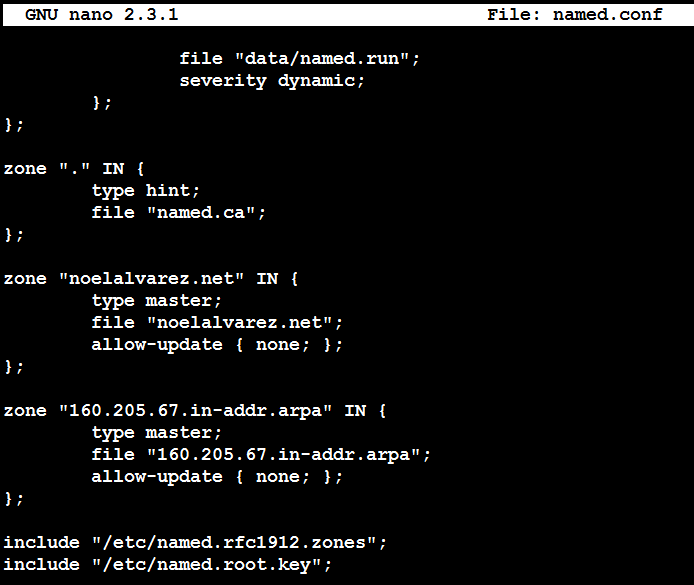
    3. Add a forward lookup zone.10-02
    4. Add a reverse lookup zone.10-02
  11. Enter the command named-checkconf to verify the named.conf file has not syntax errors.11
  12. Enter the command cd /var/named/chroot/var/named/ to navigate to the named directory.12
  13. Using a text editor create the zone file for a forward lookup. In this example it is noelalvarez.net.13
  14. Using a text editor create the zone file for reverse lookup. In this example it is the 67.205.160.0/24 IP address range.14
  15. Enter the command rndc reload to read the changes made to the named.conf and zone files.15
  16. Enter the command cd /etc to navigate to the etc directory.16
  17. Using a text editor, edit the resolv.conf file by adding configuring the server to use it’s IP address for name resolution.17
  18. Enter the command dig noelalvarez.net to query the name server for the A record of noelalvarez.net.18
  19. Additionally, you may use nslookup to query the name server for the various records that were created.19
  20. Lastly, you may query the name server from a host on an external network to verify it is a public facing DNS server.20