You may use the following (2) Microsoft Windows PowerShell cmdlets to view the domain and forest functional levels of a Microsoft Active Directory domain.
Get-ADDomain | Format-List Name, DomainMode
Get-ADForest | Format-List Name, ForestMode
You may use the following (2) Microsoft Windows PowerShell cmdlets to view the domain and forest functional levels of a Microsoft Active Directory domain.
Get-ADDomain | Format-List Name, DomainMode
Get-ADForest | Format-List Name, ForestMode
The architecture of Microsoft Exchange Server 2016 includes the Edge Transport Role server role. Below you will find a step-by-step tutorial for installing the Edge Transport Role using the command line.
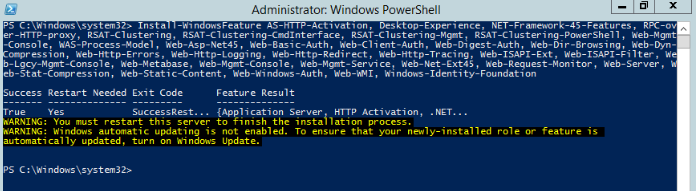
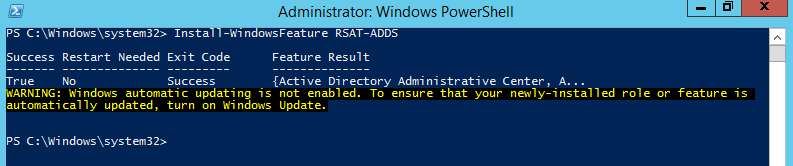
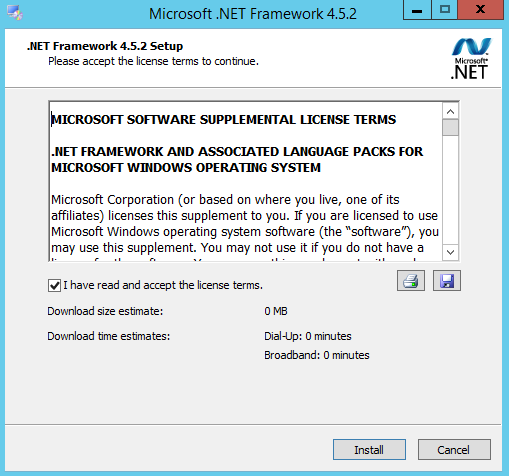
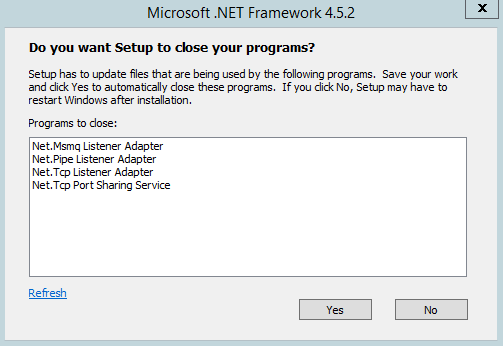
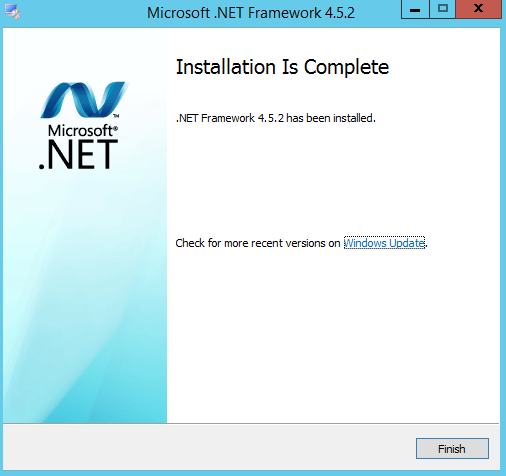
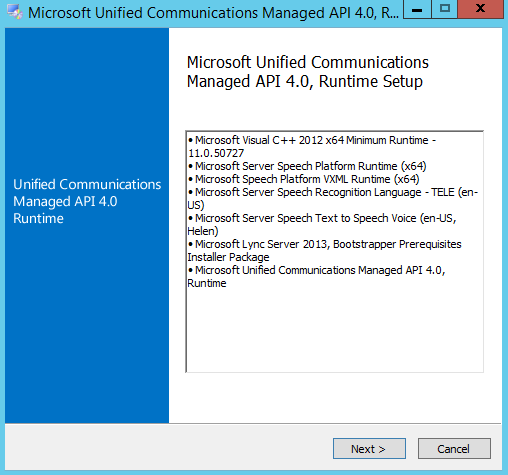
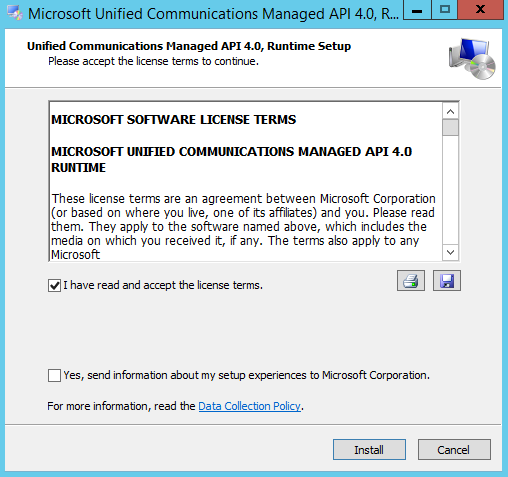
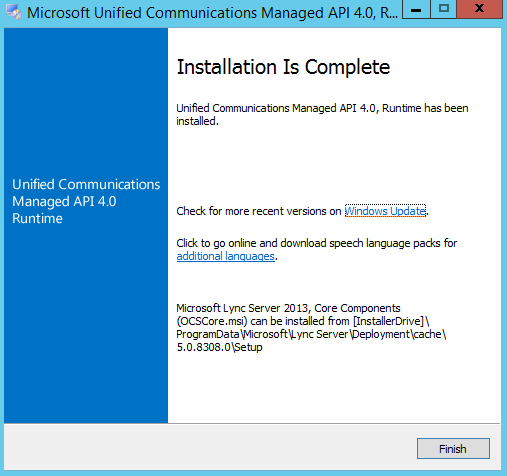
The Microsoft Exchange Server 2016 Mailbox Server role prerequisites may be installed during the graphical user interface (GUI) installation of the Mailbox Server role. Additionally, and recommended, you may use the process below to install the required prerequisites on the server that will be hosting the Mailbox Server role. These include installing operating system features, preparing Microsoft Active Directory (AD), installation Microsoft .NET Framework 4.5.2, and installing Microsoft Unified Communications Managed API 4.0, Core Runtime 64-bit.
You may use the following commands to install the Microsoft Exchange Server 2016 Mailbox Server role from the command line.
Setup.exe /PrepareSchema /IAcceptExchangeServerLicenseTerms
Setup.exe /PrepareAD /IAcceptExchangeServerLicenseTerms /OrganizaionName:
“<Organization Name>”
Setup.exe /mode:install /role:Mailbox /IAcceptExchangeServerLicenseTerms
The script below will query the status of the service(s) specified in “C:\Scripts\VMware vCenter Server\Verify_Critical_Services.txt” on the local server. The output of the script will provide the name and status of the service(s) in a formatted list for your viewing. Additionally, it is recommended that the following services be queried as they are critical to the proper functioning of VMware vCenter Server 6.
<#
.SYNOPSIS
This script will provide the name and status of the service(s) defined in “C:\Scripts\VMware vCenter Server\Verify_Critical_Services.txt”
.DESCRIPTION
This script will automate the process of providing the status of critical VMware vCenter Server 6 service(s) on the local server
.EXAMPLE
N/A.
.AUTHOR
Written by Noel Enrique Alvarez on Wednesday, November 22, 2017.
#>
#Define the service(s) to query
$Services = Get-Content “C:\Scripts\VMware vCenter Server\Verify_Critical_Services.txt”
#Query the status of the service(s) in “C:\Scripts\VMware vCenter Server\Verify_Critical_Services.txt”
ForEach ($Service in $Services)
{Get-Service $Service |
Format-List -Property Name, Status}
You may use Microsoft Windows PowerShell to obtain the NetBIOS name of a Microsoft Active Directory (AD) domain. The command is Get-ADDomain –Identity domain.com and the NetBIOS name is contained in the NetBIOSName field.
Scripting is a great way to make yourself more efficient as an Information Technology (IT) professional. With that being said, the Microsoft Windows PowerShell script below may be used to automate the deletion of a domain name system (DNS) A record.
<#
.SYNOPSIS
This script will automate the process of deleting a DNS A record.
.DESCRIPTION
This script will automate the process of deleting a DNS A record.
.EXAMPLE
Remove-DnsServerResourceRecord -ZoneName “noelalvarez.net” -RRType “A” -Name “www”.
.AUTHOR
Written by Noel Enrique Alvarez on Thursday, December 22, 2016.
#>
#Request the hostname of the server
$HOSTNAME = Read-Host “What is the hostname of the server?”
#Delete the DNS A record
Remove-DnsServerResourceRecord -ZoneName “noelalvarez.net” -RRType “A” -Name “$HOSTNAME” -Force
#End of script
You may use the Microsoft Windows PowerShell script below to get the service tag of a Dell server, remotely.
<#
.SYNOPSIS
This script will automate the process of determining the service tag of a Dell server.
.DESCRIPTION
This script will query the server you specificy for it’s service tag.
.EXAMPLE
wmic /user:administrator /node:hostname bios get serialnumber.
.AUTHOR
Written by Noel Enrique Alvarez on Monday, December 05, 2016.
#>
#Request the domain name
$– USERNAME = Read-Host “What is the username of the administrator account?”
#Request the hostname of the server
$HOSTNAME = Read-Host “What is hostname of the server?”
#Get the service tag
wmic /user:$– USERNAME /node:$HOSTNAME bios get serialnumber
#End of script
You may use the Microsoft Windows PowerShell script below to remotely add a domain user to the specified group of the server you choose.
<#
.SYNOPSIS
This script will add a domain user to a group on a server.
.DESCRIPTION
This script will automate the process of adding a domain user to a group on a server.
.EXAMPLE
N/A.
.AUTHOR
Modified by Noel Enrique Alvarez on Friday, December 02, 2016.
#>
#Request the domain name
$DOMAIN = Read-Host “What is the domain?”
#Request the username
$– USERNAME = Read-Host “What is the username?”
#Request the hostname of the server
$SERVER = Read-Host “What is the hostname of the server?”
#Request the name of the group
$GROUP = Read-Host “What is the name of the group (i.e. Administrators)?”
([ADSI]”WinNT://$SERVER/$GROUP,group”).psbase.Invoke(“Add”,([ADSI]”WinNT://$DOMAIN/$– USERNAME”).path)
You may use the following commands at a Microsoft Windows PowerShell to configure a default domain name system (DNS) server, for that instance, as well specify the type(s) of DNS records to resolve. This may be used for daily support of DNS.
For example, if you wanted to configure the nslookup session to utilize a Google public DNS server (google-public-dns-a.google.com) and query the domain google.com for all DNS records you would enter the following commands.
Additionally, more information may be found using this link.