You may use the following (2) commands to enable IMCPv4 ping requests for Windows Server 2012 R2 with Microsoft Windows PowerShell.
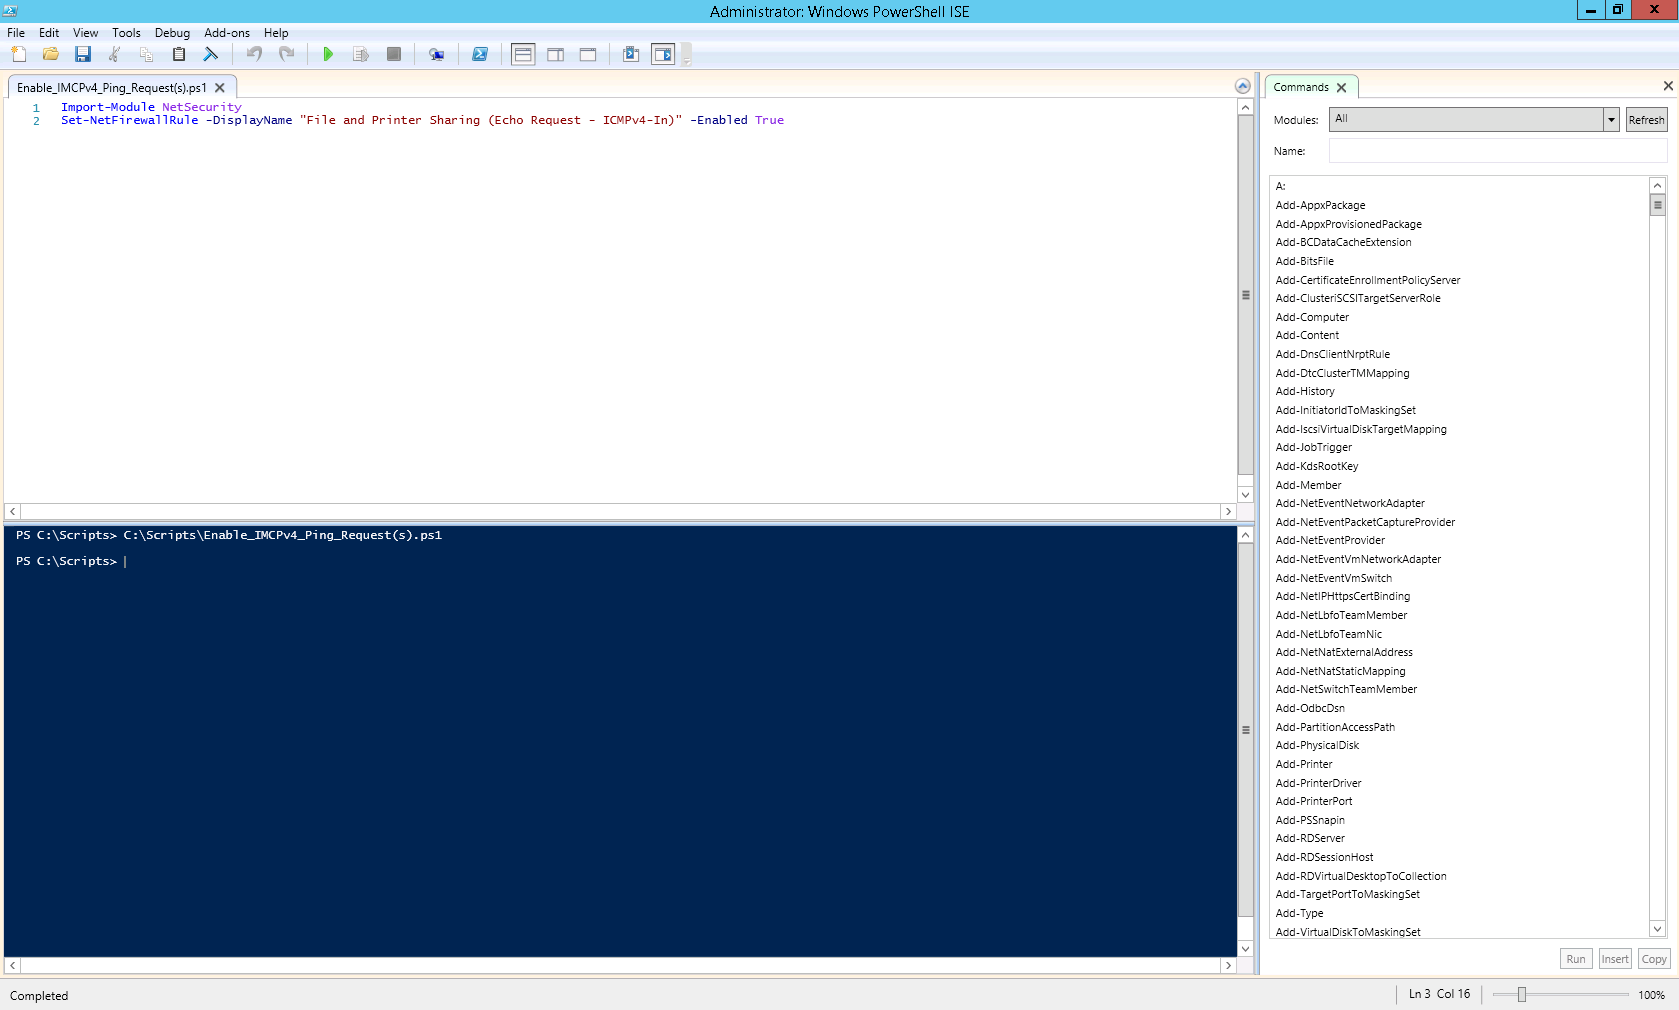
You may use the following (2) commands to enable IMCPv4 ping requests for Windows Server 2012 R2 with Microsoft Windows PowerShell.
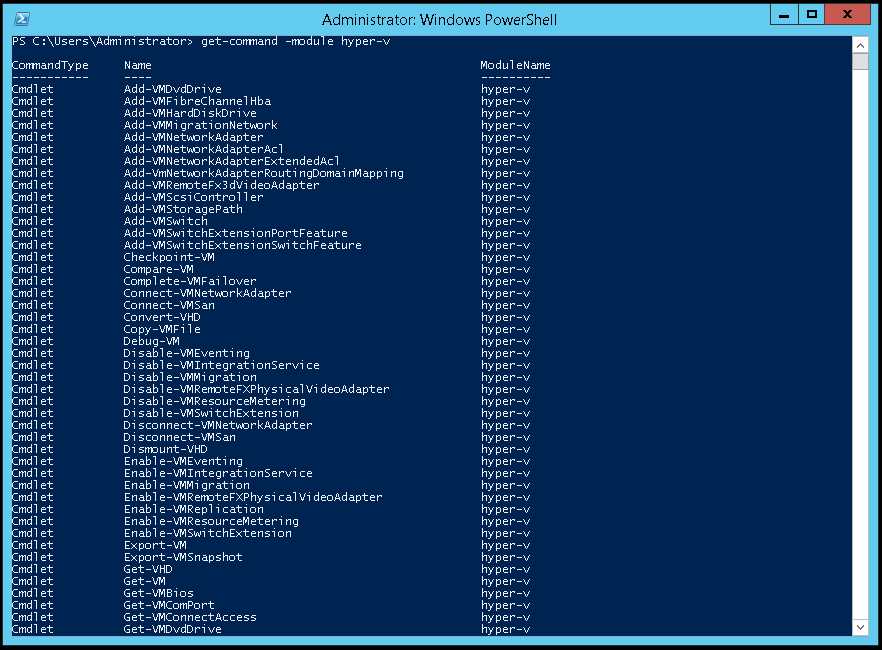
In order to view all of the Microsoft Hyper-V Cmdlets use the command get-command -module hyper-v. You may explore these commands and create scripts to automate your Hyper-V administration. Automation can save your Information Technology (IT) department both time and money.
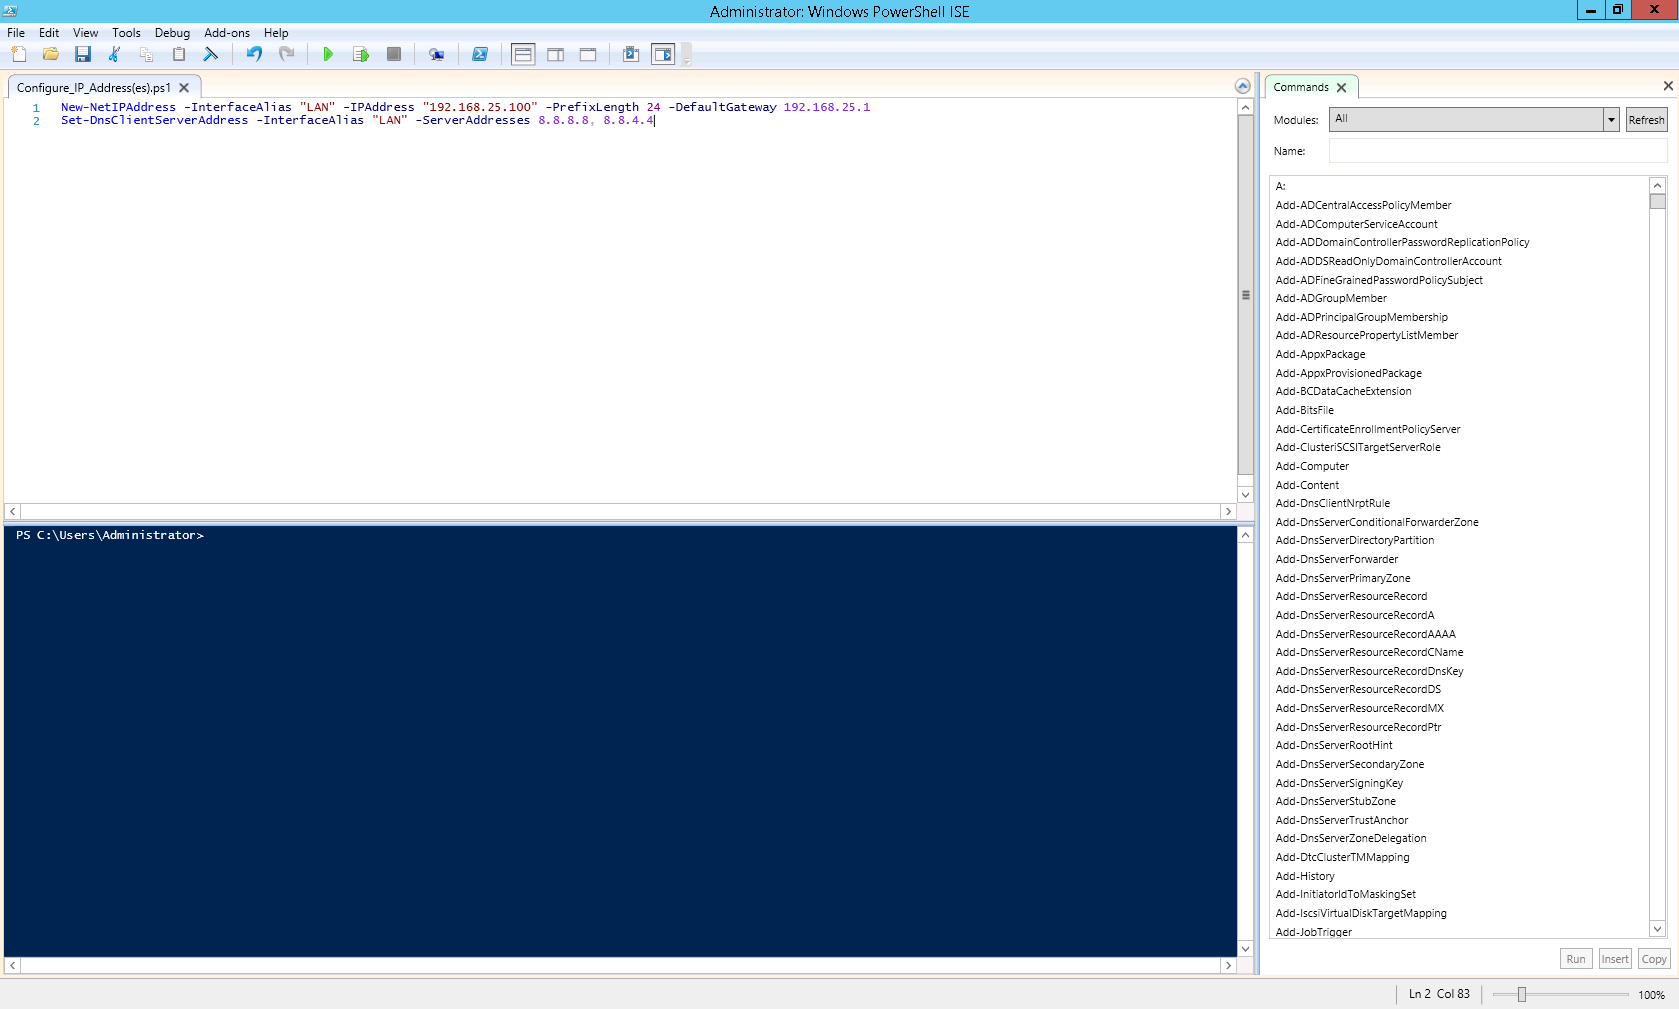
You may modify the following Microsoft PowerShell (.ps1) script to configure the Internet Protocol (IP) and Domain Name System (DNS) servers for a Network Interface Card (NIC) in Windows Server 2012 R2.
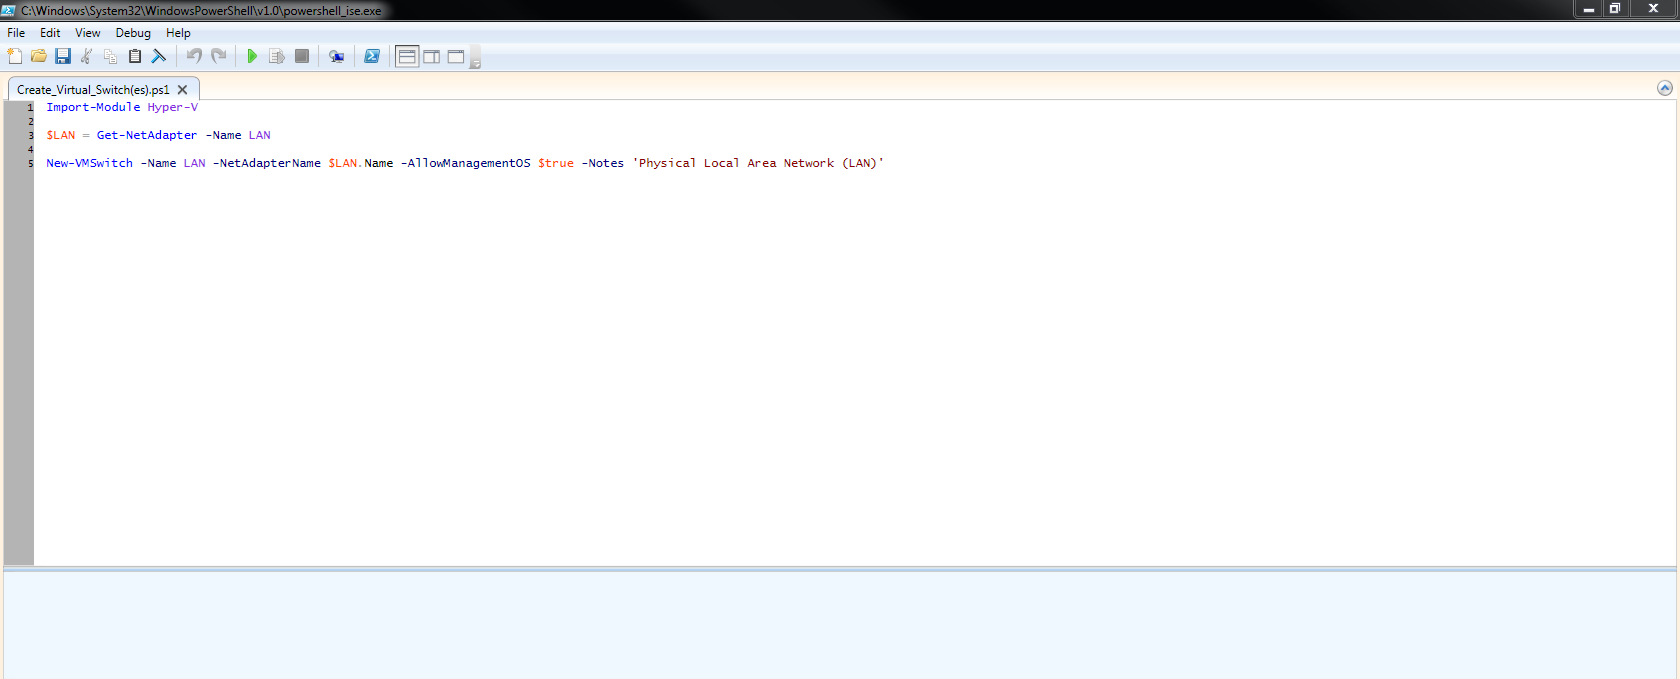
Microsoft Hyper-V allows you to create (3) types of virtual switches (External, Internal and Private). These virtual switches may be created manually using the Hyper-V Manager or you may use a PowerShell (.ps1) script to automate the process. Below you will find a script to create an External virtual switch.
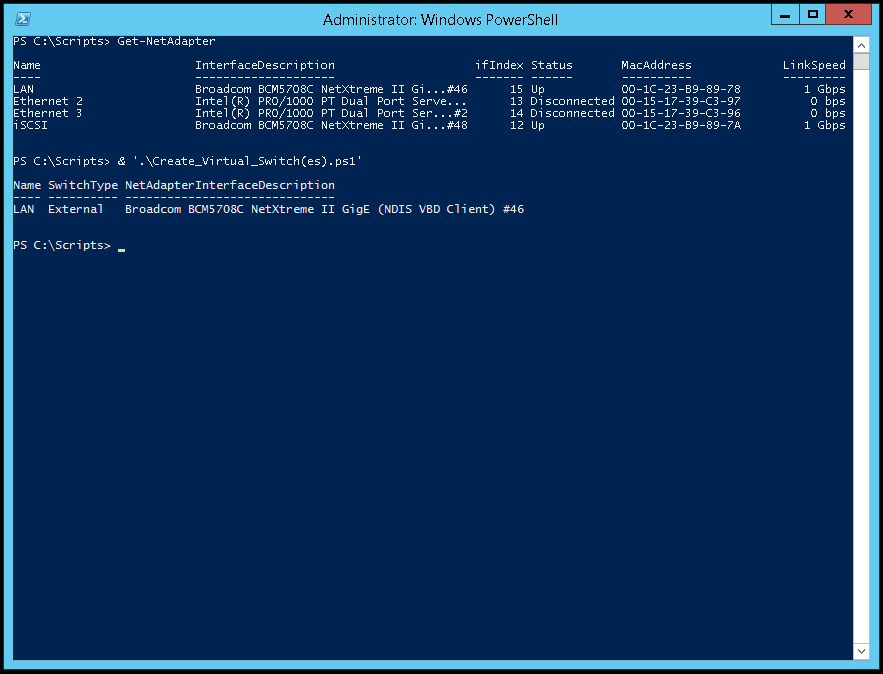
1. Issue the Get-NetAdapter command to provide a list of physical network interface (NIC) card(s) on the host. Take note of the name of the NIC that will be used for the external virtual switch.

2. You may modify the script below to create an external virtual switch.
3. Run Microsoft Powershell (as an Administrator) to create the external virtual switch.
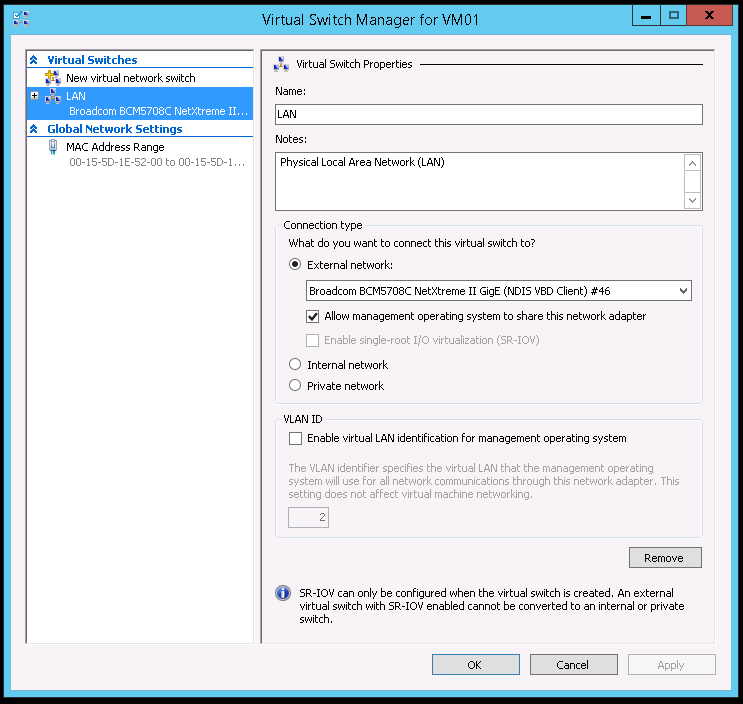
4. Lastly, verify the creation of the virtual switch using the Hyper-V Manager > Virtual Switch Manager.
Yesterday, I continued with the application of Group Policy Objects (GPO) for our workstation (desktop and laptop) users. When running gpupdate /force for a particular user, whose desktop is running Windows XP, I noticed that the GPO wasn’t being applied.
Part of my troubleshooting was to determine if the user’s desktop could access the \\domain.com\SYSVOL directory. On this particular machine it could be accessed using \\domain\SYSVOL but not with \\domain.com\SYSVOL. In other words, appending the top level domain (TLD) revealed a name resolution failure.
The solution was to start the DNS Client, Netlogon and TCP/IP NetBIOS Helper services and configure their startup type to automatic (I will need to troubleshoot the determine the root cause of the services not running).
Enjoy!
At my current employer I have been creating Group Policy Objects (GPO) in an effort to centrally administer the workstation environment, provide automation and provide consistency in workstation deployment and management.
After running gpupdate and gpresult on a Microsoft Windows XP desktop I realized that the GPOs were not being applied. After looking through the Event Viewer logs I found GPO event IDs 1030, 1097 and 1110.
It turned out that the Netlogon service was disabled. The solution was to configure the Startup type: to Automatic.
Enjoy!
I am currently in the process of automating the desktop deployment for my current employer. As a solution I am using Microsoft Group Policy Object (GPO) to map the network drives for the users. To date, most of my experience has been testing GPOs with Microsoft Windows 7 but today I was testing a GPO on a Windows XP desktop.
After modifying the GPO and placing the desktop in an Organizational Unit (OU) where the GPO was applied I expected the mapped drives to work, but they didn’t. After running gpresult I was able to verify that the GPO was in fact being applied, etc. I then logged on to a Microsoft Windows 7 desktop, that was in the same OU, and the drives were mapped.
The solution to this was simple. I needed to download and install the Group Policy Preference Client Side Extensions for Windows XP (KB943729) on the Windows XP desktop.
Hopefully you will find this information helpful.
Enjoy!
Automating application installations is a great way to cut down on the deployment time of workstations for your end users. Having completed a domain/operating system migration in the past I can attest to the benefits of an automated deployment. Below you will find a list of applications and their silent installation parameters:
7-Zip: msiexec.exe /i “7z920-x64.msi” /qn
Adobe Air: “AdobeAIRInstaller.exe” -silent
Adobe Flash Player: msiexec.exe /i “install_flash_player_11_active_x.msi” /qn /norestart
Adobe Reader XI: msiexec.exe /i AcroRead.msi EULA_ACCEPT=YES /qn
Adobe Shockwave Player: msiexec.exe /i “sw_lic_full_installer.msi” /qn /norestart
Apple Application Support: msiexec.exe /i “AppleApplicationSupport.msi” /qn /norestart
Apple Quicktime: msiexec.exe /i “QuickTime.msi” /qn /norestart
Barracuda Malware Removal Tool: setup.exe /verysilent /norestart
Microsoft Silverlight: Silverlight.exe /q
Mozilla Firefox: “Firefox Setup 25.0.exe” -ms
Oracle Java: JavaSetup7u45.exe /s
VLC Media Player: vlc-2.1.1-win32.exe /S
If you interested in deploying Adobe Flash Player 11 silently you may download the MSI from the Adobe Flash Player Distribution website. Additionally, the command below may be used to install application silently.
msiexec.exe /i “install_flash_player_11_active_x.msi” /qn /norestart
Enjoy!
You may use the following method to install Adobe Reader XI silently and accept the End User License Agreement (EULA):
msiexec.exe /i AcroRead.msi EULA_ACCEPT=YES /qn
Additionally, you may use the Adobe Customization Wizard XI to customize the installation of Adobe Reader XI. Please keep in mind that the Adobe Customization Wizard must match the version of Adobe Reader that you are installing.
Lastly, in order to get the .msi file you must first install the Adobe Reader XI application then navigate to the “C:\ProgramData\Adobe\Setup\{AC76BA86-7AD7-1033-7B44-AB0000000001}\” directory to retrieve it. This directory also contains the Setup.ini file which is needed in order to save any settings, using the Adobe Customization Wizard XI, to the .msi file.
Enjoy!